
People who choose to live in an old classic home still prefer an antler chandelier in their dining or hallways. There are also various thematic antler chandeliers that perfectly go with any modern and trendy home decor. It adds a new dimension to the aristocracy of the ambiance of your home with its eye-popping lighting fixture. These days, there are different types and designs of chandeliers in the market. But they can cost an extravagant amount and may not match your required size, shape, and design.
That’s why making a chandelier with deer antlers by hand will give you the authority to customize it in accordance with your preferences and design ideas.
Here in this article, we will be articulating everything you need to make a perfect chandelier at your home.
Is It Humane to Use Deer Antlers to Make a Chandelier? – The Big Question
Basically, the antler chandelier kits are mostly made out of deer antlers. Most people who don’t know about antlers think it is inhuman to use them for making chandeliers. They might have an image of forcing deer to separate its antlers from its head. But in reality, this is a natural process for male deer to shed their antlers once every year and one at a time.
The shedding time varies on location. In some areas, deer shed their antler in early December or late March. Otherwise, the time will be between January and February when they go through a massive hormonal change right after their mating season. They even bang their heads with trees to get rid of their antlers when the time comes. So there is nothing brutal in using the deer antlers for making chandeliers.
Let’s now look at the steps to make an antler chandelier.
Making An Antler Chandelier At Home- Step By Step
Step 1: Collecting The Antlers
In the process of making a deer antler chandelier, getting perfect antlers is very crucial. There are antler kits in the market that you can find in any hardware store. But as you are here to do everything on your own, we are not considering antler kits as an option for you. In consequence, you will have to find antlers on your own.
Now the question is where and when you will find antlers, right? So here it is.
The best place for finding antlers is in the woods. It can be too arduous to find the antlers in the woods as you will require all the antlers in perfect shapes and sizes. In that case, you must look for antlers in places where the deer mostly bed down. In addition to that, you can also look for the places deers come to feed. Hunting prohibited areas can also be a good place to find antlers because deers feel safe in those areas to shed their antler.
Deer basically choose winter for shedding. That’s why January to April is considered a suitable time for finding freshly shredded antlers.
If you are an amateur at making chandeliers with antlers, don’t look into the woods before you are done searching into easy terrains such as the meadows and open fields near the woods. Deers mostly graze in the open field with thick covers.
Remember: Always look for antlers that are rigid and similar in color and size. It will help you to create a perfect-looking structure for your deer antlers chandelier. If you don’t feel like searching for antlers into the woods, simply go to an antler dealer. You may get an affordable deal than buying an antler kit.
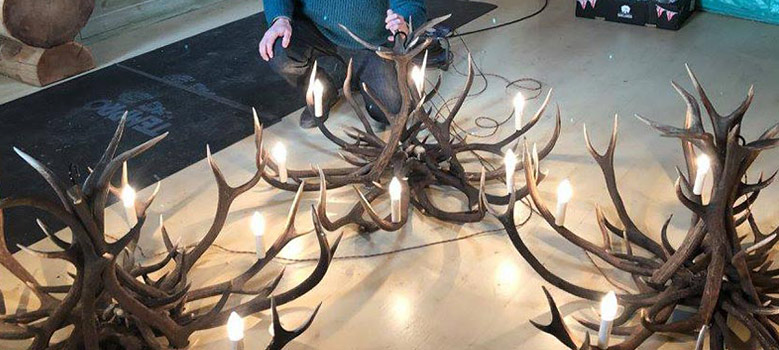
Step 2: Preparing the Structure
The base of your chandelier is very crucial as this will hold all the separate antlers together to make the shape you want to create. To start with, lay all the antlers down on the surface facing all the tint points of one antler to another. Bring all the bases of the antler in one place. Sometimes the structure is made in accordance with the thematic design where different sizes and colors of antlers may be used to make the base structure.
But whatever design you choose, the structural base should be too strong to hold all the antlers together when the chandelier is hanging from the ceiling. In that case, make a complete structure of the chandelier and tape it together before attaching each with screws. The tape will hold the ateliers together and help you to keep every piece in place while screwing.
Now, how do you connect antlers together?
Step 3: Putting the Antlers Together
Screwing is the best way to create the base of the antlers. That’s why, right after creating the structure and taping the antler, you will have to screw it together with one another. While screwing, remember that you will have to pass the electrical wire through the same channel. Therefore, screw the antler in a way so that there is enough room to channel the wire through the antlers.
While initial drilling, make a small hole. Otherwise, the antler may crumble due to extra drilling force. Insert the screw right through the attached antlers and make sure the screw has gone into both ends. Attach all the antlers, in the same way, giving your desired shape and design. When screwing is done, remove the tape.
Step 4: Electrical Wiring
Though it’s always better to let the professionals deal with the wiring, here we are going to make it simpler for you as well.
Firstly, you have to have a blueprint of how you want to place your light bulb on the chandelier. The wiring methods will differ on different lighting fixtures. But the simpler way is to plan out the ways the wire will have to go through for connecting each lighting point. The wires basically go through the antlers connecting all the lighting points and then get connected with the electrical wiring in the ceiling.
So the first thing you are supposed to do is to create a channel through the antlers by drilling holes with enough room for the wires to pass through. Then make holes for the light holders. Pass the wire through the channel and connect them with the light holder at each lighting point. Make sure all the wires that are connected with the holder are aiming in the same direction; upward.
After connecting all the holders, attach the wire with the electrical wiring dedicated to the chandeliers on the ceiling.
Step 5: Hang your Chandelier
There are many ways for you to hang your antler piece. But this is the most delicate part that needs to be taken care of with too much caution. Because a slight mistake can take all your efforts to the dogs.
- First, assemble the chandelier and the wires properly on a flat surface. You can install the light bulb after mounting is done.
- Attach the chandeliers with the mounting chain attached to the junction box. Tight the screws properly.
- Then connect the chandelier’s wire with the ceiling’s electrical wire dedicated for mounting the chandelier. But don’t forget to detach the electrical connection.
That’s it. Install the light bulb into the holder and turn the switch on. Voila! You now have an antler chandelier at your home custom-made by you.
Frequently Asked Questions (FAQs)
How Can I Connect Antlers Together?
Connecting antlers together requires drilling holes and putting screws through it. That’s how you can connect antlers together. It is mostly necessary while making a chandelier or antler light.
Can I Drill Into Antlers?
While making anything with the antlers, you may have to attach one with another. In this case, there is nothing rigid that drilling holes and putting screws into them. Drilling can be done. But that has to be in an extremely delicate way. Though antlers are rigid enough to withstand any small to the medium-sized drill bit.
Conclusion
In addition to adding aesthetics to the interior, chandeliers can be the perfect lighting fixture for your home decor. In this evolving home decor segment, the antler chandelier might be the only thing that never goes out of fashion or as a backdated trend. And making one on your own can save your time and money and help you to articulate your own design thoughts in reality.
Hope this article will help you to find everything you need.


