Hanging pictures on the wall requires picture hangers. Hangers come in varied types that are suitable for different types of pictures and wall surfaces. Our guidelines on how to use a picture hanger will help you learn more about each type of picture hanger.
Meanwhile, picture-hanging kits usually include all the accessories necessary to hang a picture frame, including wall hangers, hanger wire, D-rings, and sawtooth hangers.
Typically, picture-hanging kits come with instructions, so users aren’t left guessing which hangers and fasteners to use. You just need to check the package to make sure the kit you pick will securely hold your frame. Each kit hangs a certain weight of frame, so be sure to select the kit that meets your needs.
Installing Hangers on Picture Frames
The following steps will show you how to properly use hangers for pictures.
Step 1: Mark the Area
Mark an area about one-third of the way down from the top and slightly away from the sides of the picture frame by measuring the frame’s height and width. You will use these marks when installing hanger wires or installing D-ring hangers. If you plan to use sawtooth hangers, measure the width of the frame and mark its center placement.
Step 2: Insert the Hanger
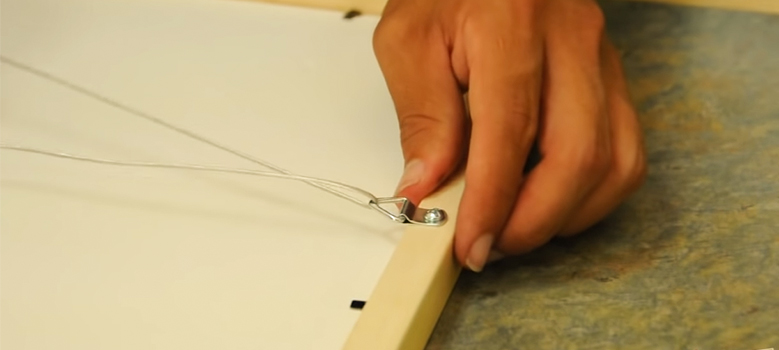
Then insert the screw eye or picture hanger in the starter hole if the frame is made of wood. Basically, a screw eye is a screw at one end with a loop, so the picture-hanging wire can be attached. This step is not necessary with metal frames since they usually come with wire-installation hardware.
Step 3: Hammer the Hanger
Use a hammer to tap sawtooth hangers in place at the marked center location.
Step 4: Measure the Distance
Make sure the screws are the same distance apart. Wire cutters are useful for cutting wires to a length 1 1/2 times the distance between screws. Whether the frame is made of wood or metal, this step is similar.
Step 5: Insert the Wire
To insert the wire, insert one end through each screw eye so that about an inch of the wire is visible through the top. Make multiple wraps around the screw eye using the lower part of the wire.
In other words, with one inch remaining on both ends of the wire, loop one end through one screw eye. The wire should be bent outward and wrapped around the wire on the other side. Toward the screw eye of the second screw, push the loose end of the wire. Using the top of the frame, position the wire in the middle of the frame and adjust its length accordingly. On this part of the wire, the wall hook will be connected.
Step 6: Wrap Around
Wrap the excess wire around the screw in the opposite direction of the wire protruding from the top of the screw eye. On the opposite side of the frame, attach the screw eye in the same manner. If the frame is fully stretched, ensure that the wire rests slightly below the top.
Step 7: Final Touch
Make sure your walls are not scratched by the screw eye by wrapping tape around the screw eyes.
Hanging Pictures With a Picture Hanger
You are just a couple of steps away from hanging on your picture. Do not be impatient, a small error can even ruin the whole thing.
Step 1: Mark the Place
Mark the top and sides of each stud with a stud finder and slide it along the wall where you want the picture to rest. You can ensure a picture is securely attached to a wall with your fasteners set into a wall stud.
Step 2: Measure the Picture Frame
To indicate where each end of the frame will rest on the wall, measure the picture frame and mark the wall accordingly. Mark the center of the first mark again if you are using hanger wire or D-ring hangers. When using sawtooth hangers, mark on the wall the distance between the end of the frame and the end of the hanger. For best results, move the picture slightly to make sure the picture is fastened to a stud.
Step 3: Drill a Hole
Make a pilot hole for each fastener in the wall. The fasteners can be hammered or screwed directly into the drywall, but pilot holes will prevent cracks.
Step 4: Hang the Picture
You can now hang your picture by screwing or hooking the pilot hole. Make sure the frame hangs straight by using a level along the top. There may be a few adjustments that need to be made to the picture or the hangers. You have done it. Congratulations!
How to use Plated Nail Hangers Small Pictures
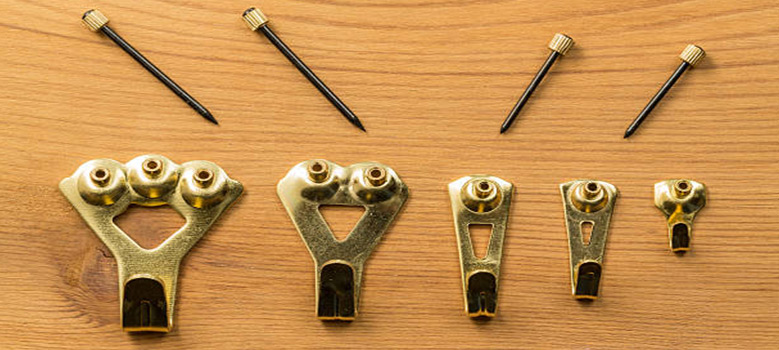
For smaller pictures, locating a stud is not necessary. You can hang them with tiny, plated nail hangers.
Instructions to Follow for Plated Nail Hangers
Step 1: Measure Your Frame
Use a tape measure to measure the distance from the frame to the back hardware of the picture.
Step 2: Move to the Wall
By utilizing the center mark that you made on the wall, translate the measurement onto the wall.
Step 3: Drive the Nails Home
You can prevent cracks in plaster walls by taking a few extra steps. Mark the hole location by putting tape over it. Through the tape, drill a small hole into the plaster.
How to Use Specialty Hooks for Heavy Objects
You can use hooks without tools or studs to support heavier pieces. A hook will curve up against the wall as it is pressed into the drywall, creating a strong support.
D-rings: A pair of D-rings is a good addition to a heavy picture to give it additional support.
Anchor Screw: This is another option that works as an anchor for drywall walls.
Knowing this is helpful: A wide range of frame hardware can be paired with specialty hooks and screw anchors.
Steps to Follow for Specialty Hooks
Step 1: Measure Your Frame
Measure the distance between each ring and the top of the frame.
Step 2: Attach the Tape
Tape the center point of the frame and the locations of the ring to a piece of painters tape and then level the tape.
Step 3: Utilize the Level
Use the level to measure the distance between the marks you made on the wall earlier. Place the rings on the wall.
Step 4: Measure and Mark the Screw Holes
Mark the screw hole on each hook by holding it on its mark. Use a screw anchor and hook if they are not in line with studs.
Step 5: Put the Fasteners in
Using a drill, drive the fasteners
Frequently Asked Question
What is the best method for hanging pictures? Nails or screws?
For hanging large, heavy pictures, screws are usually better than nails because they provide more holding power. Whenever you hang a picture between studs, you should use a hollow-wall anchor. Examples of hollow-wall anchors are the toggle bolt, spiral anchor, or molly bolt
Final words
Utilizing our weapons in an intelligent manner is always important. Knowing how to hang a picture isn’t enough; you have to know how to use a picture hanger or picture-hanging kit.
Last but not least, hang heavy or long pictures with two or more nails. Aim for about an inch between each hook on the wall. No doubt, support, and adjustments will be easier with two hooks. If possible, screw into a stud.

