I am going to share five tips on how to hang a gallery wall in your house today. It’s not easy hanging pictures on a gallery wall, and I’m equally intimidated by it. Having said that, this article will focus on how I overcame that fear and became good at this. Therefore, I hope my five tips will help people to hang their picture gallery walls at home when the time comes.
Let’s begin by discussing my five tips.
Easy Tricks to Hang a Gallery Wall
By default, hanging a gallery wall is an easy task, trust me! But problems arise when we fail to put the tricks and techniques together. So, today, I’ll share some of the easiest tricks with you to hang your gallery wall.
Visualize the Space
First and foremost, visualize the space in which you want to work. Imagining a space without pictures helps me decide which frames to buy and what size they should be.
If you need help visualizing what your gallery wall will look like, head on over to Pinterest- they have hundreds of beautiful photos of gallery walls. And it will help you choose the appropriate frames and colors for your house.
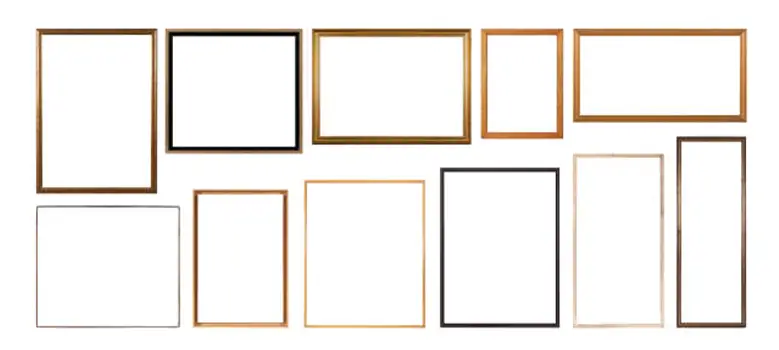
Choose Big Picture Frames
Second, make sure your frames match. Picking frames can sometimes be challenging because there are so many choices out there. Nevertheless, I recommend using a big frame inside a smaller mat for a striking visual effect.
Locally, I picked up my frames from a shop. They’re 11 by 14 with an 8 by 10 mat. And, they were only eight dollars each!
Use Tape
The third tip is to use masking tape or painters tape. Using them, you will be able to evenly space out your frames. Make sure you mark the middle of your space as soon as you have measured it. I use a chalk marker since it is easily erasable. However, you can also use a pencil.
The next step is to use a level, and once you’ve got a level up on the wall, you’ll want to place it directly where you marked the middle of the wall. Also, ensure that it is level and then trace a line from the top to the bottom. Then, continue doing this all the way down the frame space.
After you have drawn a straight line, take your tape and tape it along the line from the top to the bottom.
You should now have a straight line of tape. Ok, before we hang the pictures, here is another hack for you. It is number four.
String or Wire to Hang Frames
Your next step is to use wire or string. In addition, you’ll tie it on the back of the picture frame.
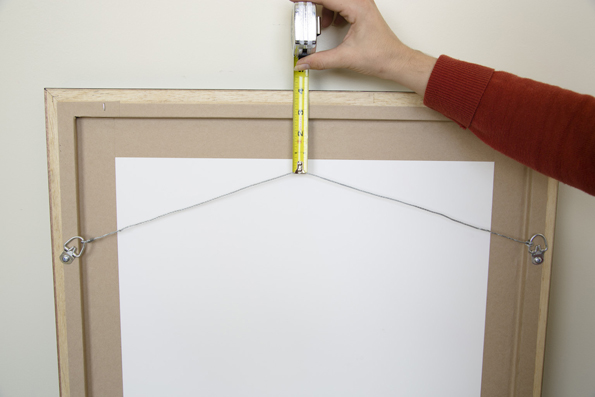
So, rather than having to measure twice and nail two different nails, you can create one spot where you hang it. You’ll only need one. That’s all done now.
The general rule I follow is to measure six inches down from my tape line and then a foot from the ceiling. Hopefully, this will go to change based on the spacing of your picture frame.
Use Thumb Tacks
Using a thumbtack as a temporary solution is tip number five. In other words, you’re going to attach the pictures with thumbtacks.
Thumbtacks have the advantage of making even smaller holes than a nail, making them so useful. In addition, you don’t need a hammer for this. With your thumb, you can stick it on the wall.
Now you can hang your pictures, check that everything is in order and then you can add a nail. I mean stick nails under your hanging pictures.
To evenly space the pictures, I typically add another tape line underneath them, followed by thumbtacks and then my pictures. A second tape piece can be added underneath that one, as well as both measuring and adding the thumbtacks. Thus, you can imagine how I measure 6 inches away from the tape, followed by 2 inches down.
Hopefully, now everything is hung on the wall. Taking a step back will help you determine if everything is in order. Make sure that everything looks evenly spaced.
As long as you measure properly and use the tape, it should look pretty good. After that looks good, just remove the tape and you’ll have a beautiful line. As soon as everything looks good, what are you supposed to do? Take your frames down and use nails to hang your pictures. In addition, there are several types of picture hangers available, you can consider any of them instead. Find out why picture hangers are useful.
It makes sense that you will take apart your frames and you will use the nails you picked up to hang the pictures.
The nails are going to be hammered in directly where the thumbtacks were. Once you hang the pictures back up, you’ll notice they are a little crooked. No worries, I’ve got a BONUS tip for you.
Bonus Tip
The bonus tip is using mounting tape (double-sided tape) to secure the pictures to the wall. Get yourself some mounting tape from anywhere you like. Plus, you need a level. If you want to hang heavy and long pictures, you will find this post helpful.
So basically, you just place a piece of mounting tape on the bottom corners of each picture. It is not necessary to remove the backing tape just yet. Therefore, I hope everything looks good on your wall. If it is still crooked, no worries! Just use a level.
The next thing you’ll do is place the level on top and make sure it’s level and then you’ll remove the black pieces of the mounting tape and push firmly on the picture. So, your pictures are going to stay really well.
I do this because my kids like to run through the hallway right there, and I am afraid they will knock over the pictures.
However, this also keeps the picture secure if there are earthquakes or anything along those lines, Haha.
Frequently Asked Question
Hanging Gallery Walls: What is The Easiest Trick?
- Gather your materials first. Obtain the necessary supplies and pieces for your gallery.
- The second step is to prepare the wall. Prepare the wall you will use.
- Make templates in step 3.
- In step 4, mark where the nails or screws should go.
- The fifth step involves laying out the templates.
- Then install screws and nails.
- Lastly, remove the templates and hang the art.
Final words
So it’s all about how to hang a gallery wall. I hope it turns out so cute on your wall. Please feel free to ask any further questions about the hanging gallery wall in the comments section below. I wish you luck!