
If you want to host a sophisticated dinner party with a charming environment in your dining room, you must have a fancy chandelier installed on the ceiling. However, if your home is older, there may not be an internal wiring system for overhead lights, such as chandeliers.
In such a situation, you might wonder how to install a chandelier in your dining room or entryway without wiring. Gladly, the article discusses how to hang a chandelier when you do not have the wiring yet in your home.
An Easy Way to Hang a Chandelier Without Wiring
Most older houses do not have wiring systems for chandeliers, so people use different lamps rather than overhead lights. However, a chandelier and lamps together can enhance the overall look of an apartment. As a matter of fact, installing a separate wiring system for a chandelier is too difficult in an old house. Rather, trying to do such innovations may damage the current appearance of the home instead of improving it.
Considering all these things, the only solution here is to install the external wiring manually. In that case, you’ll need to hide the chandelier cord so that it doesn’t look. When considering the entire process, you’ll need some tools to accomplish the success of this project. The list of the required tools includes:
- A cord cover
- A ceiling hook with toggle wings
- A stud finder
- And a wireless wall switch
After arranging all these tools, you can now move on to the final project. The point to be noted here is that you don’t need to follow any critical working process, like mounting and installing a chandelier. Because, the junction box setup and wirework make the installation process complicated when you have a wiring system in your home. On the opposite side, you’ll not face such complications in this process.
1. Taking The Necessary Measurement
The first task of this process involves the measurement of the necessary things. So, you should note down the weight of the chandelier first. Because, the weight is essential when you adjust the chandelier’s hanging. Without a proper weight measurement, the ceiling can get damaged.
Besides, you should keep in mind the size of the chandelier. Specifically, it is better to buy one which perfectly fits the height and size of your desired room. Anyway, you need to measure the height between the floor and the ceiling. Then, decide the height where you want to keep the chandelier. This height is considered when you finally hang the chandelier.
Usually, every chandelier comes with a larger chain and cord. So, you need to get the proper height so that you can exclude the excess part from the chain and keep the chandelier at the correct level.
3. Converting The Wiring
As soon as the measurement is completed, you can set the connection by converting the wiring. To do this, you can hire a professional if you don’t want to face any hassle personally. Most people prefer an expert in this step because of the unknown technical tasks.
When you are on your own, you must find the male end of the extension cord and connect the chandelier’s wires to it. The easiest solution to this task is to use a heat shrink tube. Once you have set up the wiring with the wireless signal adapter, you can use the heat shrink tube to splice it.
3. Installing The Ceiling Hook
After converting the wiring connection, you need to install the hook. In the first place, you need to find a driller ceiling hook that can hold the previously measured weight of the chandelier. Typically, the elegant-looking chandeliers are a little heavy and require a tough hook for hanging. Though you need to spend a little more, we prefer you buy a high-quality ceiling hook that can support the chandelier weight without hesitance.
With this intention in mind, you need to locate a joist for installing the hook. And, a stud finder can help you with that. Use this tool to find a stud exactly at the targeted location of chandelier installation. If you don’t find a stud there, you need a ceiling hook that comes with toggle wings. To put it another way, you actually don’t need any stud for the hook if your ceiling hook has toggle wings.
Indeed, the toggle wings of a high-quality ceiling hook can hold twenty pounds, which is enough for light and slightly heavy chandeliers. If your chandelier has a lower weight than this, you can install it anywhere on your mid-sheet drywall or a hollow wall. When your chandelier is heavier than twenty pounds, you need to change the chandelier installation location to a stud available place.
4. Masking The Cord
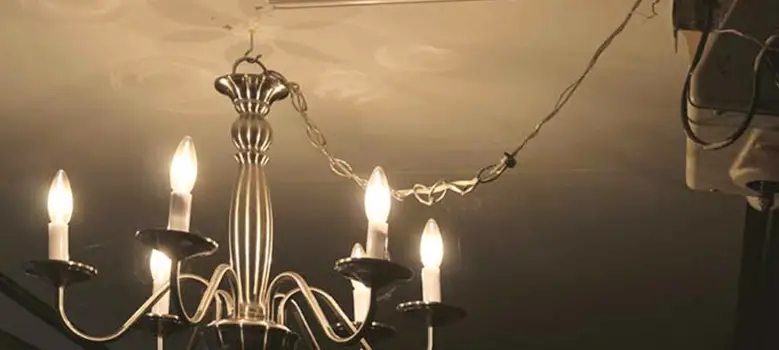
After attaching the ceiling hook to the roof, your rewiring is now completed. At this instant, you need to cover the cords. Open cords are obtrusive, and they detract from the chandelier’s beauty. In this case, getting a matching cover to cover the cords makes sense.
Typically, the color of the wall is the best choice for cover color. This allows you to conceal the cord easily. Additionally, you can tuck the cord behind a painting or mould it around it to make it more effective. Regardless of the situation, the cord runs down the wall, and the cover needs to conceal it.
5. Setting The Wireless Switch
Finally, you need to set the wireless switch on the wall. Because of using such a feature, you don’t need to face the hassle of plugging and unplugging the chandelier lights. Find a suitable place on your wall and fix the wireless switch in that place. Then, use it to automatically turn the chandelier bulbs on or off without plugging in.
Conclusion
Chandeliers with wiring are very straightforward to install, but you can creatively install chandeliers without wiring. As you can imagine, setting up the layout and location of the cord line is quite fun. Despite the fact that you can directly hang a chandelier via a plug-in system without the need for wiring, this is not a very desirable system. The chandelier needs to be plugged in every time it’s used. So, choose the conversion of wiring if you want a hassle-free experience.


