
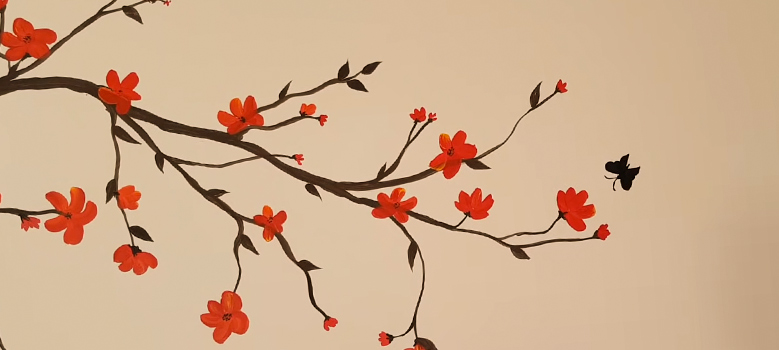
It’s pretty easy to paint trees, even on a large scale. It is impossible to see every leaf on a tree, but rather patches of green throughout the tree are created by sunlight. The key is a scale with an oversized tree, as you’d have in a mural. You can determine the tree’s size by considering its surroundings. As a result, you can break down the design into manageable pieces.
How to Paint a Tree Wall Mural in 4 Steps
Use a flat wall to paint your tree mural. It’s pretty much the same process as painting it in a corner. The only challenging part is getting the corner right. It is not necessary to worry about it, as after following this step-by-step tutorial, you will be able to paint a beautiful tree mural on your wall. Get ready for the work by taking some basic steps.
Step 1
Get your tree design ready: The first step is to create a tree design that you wish to paint in your room’s corner. Draw it using a pencil, pen, or any other tool of your choice, or print it out using a printer.
Step 2
Cleaning the walls: Cleaning them before painting is always a good idea since unclean flat walls can dramatically impact the final result. Clean and dry cloth to wipe off any dust or dirt. Wash off any impurities with a sponge and warm water if you cannot remove them with a dry cloth.
After washing the walls, wipe them down with a damp cloth and let them completely dry before painting. If the walls show signs of damage, such as cracks, mold, dirt, or wax, you should repair them, or they will appear on your work.
Step 3
Decide what size tree you want for your mural. Think of its placement concerning people, animals, and other objects in the mural’s foreground, middle ground, and background. Calculate the size of the tree in feet and inches.
Step 4
Divide the tree into leaves and bark. It would help to decide how much trunk you want concerning the needle-laden branches in a pine tree. Calculate the leftover inches and feet.
The Following Techniques Will Help You Get Started
Grid Technique
Grid techniques involve drawing grid lines over our original design and replicating their proportions on the walls in a larger size. Once these grid lines have been removed, we can freehand the design onto the wall.
Step 1
Create a grid on your paper tree design—Mark off equal-sized squares with a pencil and ruler.
Step 2
You’ll need a soft pencil or chalk to transfer the grid to the wall corner. You will need to do some math for this. Scale up the tree design by multiplying its dimensions. It is advisable to match the tree design’s size to the grid on the wall in a 1:1 ratio. Level the wall’s corners using a leveler.
Step 3
Using a pencil, outline your tree on the wall square by square, referring to your paper design.
Step 4
Following the outline, carefully erase all the grid lines without erasing your drawing.
Projector Technique
This technique involves projecting our design on the wall and tracing it. This technique offers unlimited coverage, so it is ideal if you are planning to paint a large tree on your walls.
However, this is not without its downsides. Projector images usually skew, so check from a distance regularly to ensure your design is translating correctly on the wall if your design has many edges.
Step 1
You already have one tree design in color, so make one in black and white. Making the black and white copy on a transparent sheet is best.
Step 2
Place the projector facing the corner a few feet away from the wall. It would help if you turned on the projector once you had mounted the black-and-white copy on a transparent sheet. Position your projector correctly so you can see the design on the wall as you like. Place your projector on the floor, so you’ll know it hasn’t moved if you decide to take a break.
Step 3
Using a soft pencil, trace the tree’s outlines on the wall. If you make a mistake, keep an eraser handy.
Step 4
Start with a wide and flat paintbrush, and paint the larger areas of your tree design, adding texture to the trunk with a sponge. The best paint for this project is acrylic or interior latex paint.
Step 5
With a fine-tip paintbrush dipped in brown paint or another color of your choice, you can begin painting on the details, such as leaves and outline sections of the tree, once the more significant areas are dry.
Step 6
Before touching the paint, please wait for it to dry completely, and then use an eraser to remove any visible pencil marks.
Tips
⦾You may want to take a few steps back, look over your work, and see if there are any mistakes you need to fix. You will notice a few spots where the paint ran, or the colors did not blend well after the paint dries.
⦾To ensure that it stays vibrant and beautiful for a long time, you should protect it. You worked hard to make it look gorgeous. A paint varnish will protect the mural. Choose a matte or satin varnish that is water-based, clear, and non-yellowing. Avoid glossy ones, as they look too shiny.
⦾You should mix the varnish with water according to the ratio on the back of the bottle and use a wide paintbrush to coat the whole mural if you want the most effective results, double coat the seal within a day of the first coat drying.
Frequently Asked Questions
How Do You Paint a Wall Mural for Beginners?
You can apply the paint with a paintbrush or roller. Paint the large areas first, such as the background. Adding details to your mural requires a smaller paintbrush. Refer to your sketch when adding the details, penciling in before you paint when needed.
What Kind of Paint Do You Use to Paint Trees?
Water-based latex paint is the best product for painting tree trunks. Dilute the paint by mixing one gallon of latex with four to five quarts of water. Cornell University found that a full-strength application painted on provided the best protection against borer infestations.
Conclusion
Adding a tree mural to a small space can open it up and create a sense of relaxation. When it comes to design, you shouldn’t always play it safe. You can create fabulous, inspiring, one-of-a-kind creations by taking risks and challenging yourself. Yes, we know. The process of making decor decisions is easier said than done, especially when choosing colors and shades.


