
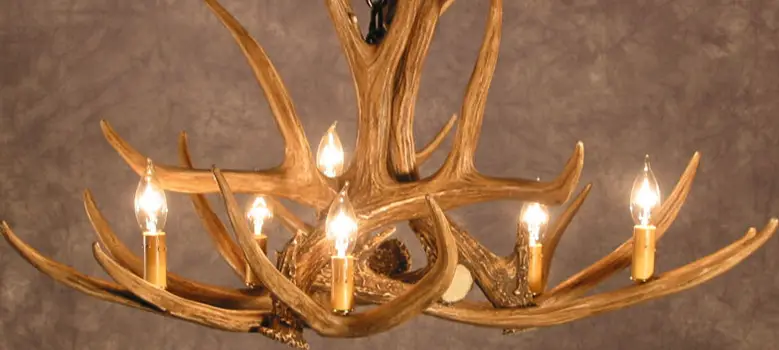
A chandelier made with antlers is one of a kind because of its eye-popping unique design. Since collecting antlers is a tough job because of the unavailability, this fancy style of chandelier is sporadic to be seen in people’s homes. Besides, there is less possibility of getting a suitable professional around you who can work with antlers.
So, when you are thinking about owning one of this kind, you must know how to make a deer antler chandelier out of many different-shaped antlers. Today, we share requisite instructions in this article to help you with the making of your new antler chandelier.
How To Make A Deer Antler Chandelier
In most cases, making an antler chandelier involves a long-term process. Because collecting the required antlers for the chandelier is not a simple task. However, when you are a hunter and have a huge collection of antlers in your home, this issue may not concern you. Without further due, let’s see how you can make your own antler chandelier.
1. Select The Antlers
Before moving to the main project, you should choose the deer antlers first. To decide about the number of antlers you need, you should think about the size of the chandelier. If you want to make a gigantic chandelier, you may need more than 25 or 30 antlers. However, we’ll focus on creating a medium-big chandelier that requires 15 to 20 antlers in structure.
As a matter of fact, antlers come in many shapes and sizes. So, finding a suitable size is a very tough job. If you choose to get deer antlers, you may need to examine more than fifty antlers to get the perfect ones. To make it easy, you can draw a design of the chandelier to get an idea about the size and shape of the antlers.
2. Collect The Selected Antlers
After selecting the size and shape, you need to manage these antlers from somewhere. To be specific, collecting the antlers is the toughest step of this chandelier-making process. Because, most gamekeepers are the major collectors of exotic antlers, and they keep deer antlers as their own property. And, they don’t like selling those antlers.
For this reason, it is better to search for an antler dealer. This type of dealer can show you hundreds of collections, and you can choose similar sizes and shapes from them. Not to mention, you should buy both right and left-hand antlers at a 50/50 ratio. In this way, your antler collection process can be completed within a short period.
3. Build The Structure
When your antlers are arranged, take all these antlers into the project. Now, start making the structure of the chandelier. To do this, you need to lay all antlers into the work surface and pair them with each other. Each pair should be arranged by a left and a right-hand antler facing their tine points with each other.
To start working with the structure, make the chandelier shape by attaching the antler pairs using electrical tape. Move the antlers to get the perfect frame. After getting the exact structure you want, use more electrical tape to bind it tightly.
4. Screw The Antlers
Since your chandelier structure is ready, let’s screw the antlers to give the chandelier a permanent shape. The important thing to realize is that the wires will go through the inner part of the antlers. So, be careful not to block the wiring path when screwing the antlers.
In the screwing process, you need to screw strong antlers without damaging the structure. In that case, a standard drill may not fulfill your needs because of the risk of breaking the antlers. So, you can use a Dremel tool to make the holes for the screws. Remember that the holes should be 0.5 millimeters less thick than the screw. Then, screw them into the holes, keeping both ends of the screws outside. And, ignore the tapes when putting the screws inside.
5. Cut The Excess Parts Of The Screws
Now, attach a little grinder disk into your Dremel tool and use it to cut the outer parts of the screws. This way, the antler surface remains flat despite being screwed. After that, you need to fix the route of the wires. Usually, the wires enter from the top of the chandelier and reach all lights using branch wires. So, use the tape to mark the crossing point of the route between two antlers.
6. Drill The Wiring Route
For the drilling process, you cannot use a regular drill bit. Use a long thin drill bit, which is longer than at least 30cm. First, start with a sanding tool to make the place of holes smoother. Then, drill using that particular bit and try to reach as far as you can. Here, you should ensure that your re-entering point has the same distance as the length of the first drilled hole.
Basically, your idea is to drill back and forth until you reach the bulb installation spot. One important thing to remember is that the wiring includes both double and single section wires. So, you should make broader holes in the route of double section wires. And, make giant holes for the bulb holders. After drilling all the required holes, make the rough edges smoother using a sanding tool.
7. Wire The Chandelier
First, attach the bulb holder to the chandelier using a high-quality superglue. Then, measure the required wire length from the ceiling to the bulb holder. As different bulbs can be in different positions, the size of the wires won’t be the same. When you feed the wires through the top of the chandelier, bring them out from the bulb holder. Keeping a little bit of wire end on the outside of the holder, tape that little piece with it.
After that, tighten the wires by pulling from the top part. At this stage, you can test the wires after giving current to the setup. Test every bulb holder using a tester and confirm every end is getting the electricity flow.
8. Cover And Paint
Truly, the holes of the antlers create a terrible look of the chandelier. Besides, you need to cover these holes to protect the wires inside. Notably, you can use any kind of putty-like epoxy resin to close the holes. Moreover, you can use this putty to fix the area of the screw ends. After that, you can paint with a matched color like the antlers. This way, the sign of the holes and scratches won’t be noticeable.
9. Hang The Deer Chandelier
Finally, hang the chandelier into the ceiling using a chain. To do this, arrange a junction box into the ceiling. Then, set a hook to hang the chain into that spot. After joining all wires into the electrical box, attach the chandelier chain to the hook. And, your antler chandelier is ready now.
Conclusion
As shown above, you should only decide on building a deer antler chandelier when time is not your primary concern. In most cases, you may face difficulties finding suitable antlers for the chandelier. When you’ve arranged everything related to the project, use your crafting sense to design the chandelier. At the same time, carefully handle the wiring and drilling so that the chandelier structure doesn’t break.


