
In addition to being functional tools, knives can also serve many other purposes. Knife display cases do more than just display knives on a wall. They also preserve them under optimal conditions for long-term storage. Following proper methods can prevent scratches and dents from occurring on your blade. Besides, knife blocks take up valuable counter space if you have a compact kitchen.
Hanging your utensils on the wall makes it easier to clear your counter space and select the right knife. You can keep your blades in an easy and convenient place by hanging them on a magnetic strip or using a homemade rack.
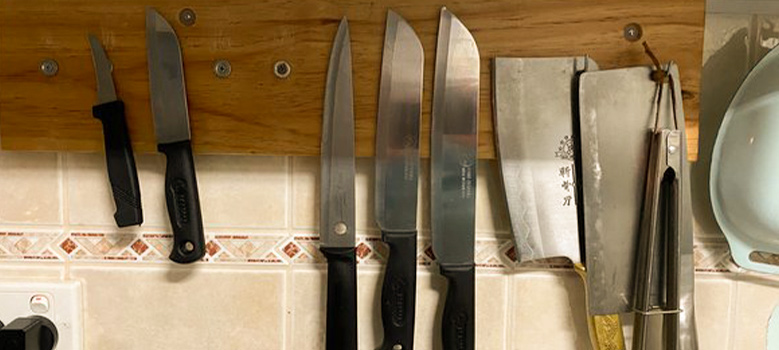
Best Ways to Hang Decorative Knives on the Wall
You know how vital knife storage is if you are a knife collector like me. It’s essential to keep them sharp, dry, and out of the sun to ensure they stay rust-free for as long as possible, but how you store them is equally important. Do not let your knives get beat up in a drawer. The following are some different ways to hang on a wall.
Magnetic Knife Strips for Hanging
Step 1:
You will need to find an area on your wall where you can hang the strip. Ensure you have enough space to hang your knives to grab them quickly. And have enough space to choose a knife without knocking others over. And Make sure children cannot access the knife strip.
Step 2:
Make sure you purchase a magnetic knife strip. Buy two shorter strips to divide your knives into separate rows, or find a magnetic strip large enough to hold all your blades. You can purchase knife strips at specialty kitchen stores or online.
Step 3:
Mark the wall where you will hang the strip using a level. Start by marking one end of the knife strip on your wall. Check the magnetic strip’s straightness with the group. Draw a line where the ribbon should hang using a pen or pencil. If your space permits, hang the strip diagonally or vertically in your kitchen.
Step 4:
Mount the magnet on the back with mounting strips. Attach the magnetic strip to both ends with adhesive, such as Command strips. You should apply at least one more mounting strip in the middle if you have a more extended magnet or plan to support a large number of knives. You can also easily remove Velcro attachments from some mounting strips for a firmer fit. With a drill and screws, you can secure the strip further to the wall.
Step 5:
Place the magnetic strip on the wall and adhere to it. Hold the adhesive firmly for 30 seconds on the wall. Before hanging knives, wait 1 hour for them to comply with the wall entirely.
Step 6:
The blades of your knives should point up when you hang them. Make it easy to grab your knives by organizing them. After you’ve cleaned the knives, please keep them in size order so you can quickly find the right place to return them. Pull the handle straight when removing the knife, so the blade tip does not stab into the wall.
An Easy Way to Mount a Knife Box
Step 1:
To determine the height of the board, measure the length of your longest knife. You can calculate the blade tip between the blade and the handle. To prevent the edge from hanging out of the bottom, purchase a 1/8 inch (3.2 mm) wooden board that is longer than the blade. Ensure the board is at least 12mm (13 mm) thick but not more than 1 inch (2.5 cm).
Step 2:
Measure the widths of all your knife blades to determine the length of the board. Measure each blade’s widest part with a ruler or tape measure. Taking the space between slots into account, add 1 inch (6.4 mm) to each measurement. After measuring all the dimensions, add them to determine the board’s length. You should add 1 inch (2.5 cm) to the final size of the vinyl side pieces.
Step 3:
Iron three layers of veneer edging on the left and right sides of the board. Here, you will use the edge to build slots for the knives rather than conceal the plywood’s exposed sides. On the back of the thin veneer edging, apply heat-activated glue. It would help if you cut the board’s edge to the same height as the edging. Attach the first layer to the main panel using iron on low. For the remaining two layers, repeat the process. It is possible to purchase veneer edging at any home improvement store. You will receive it in a roll.
Step 4:
Mark the widest part of the giant knife blade on the board. To determine the widest point, use a pencil. Some knives have a curve near the tip, while others have a point at the base of the blade. To prevent damaging the blade’s sharp edge, leaving 1/8 inch of wiggle room. Measure without the knife so you can work more efficiently.
Step 5:
On the mark, iron the edging. Make sure the edge lays straight and not at an angle when you line it up with the pencil mark. Make sure the cutter is flush with the sides of the board by ironing it on three layers. In addition to keeping your knife blades sharp, the slots will hold them in place to make them easy to grab.
Step 6:
For each knife, repeat the process. Measure the widest part of each knife’s blade as you lay on the board. You can create specific slots for each knife by adding edging between each blade.
Step 7:
Apply glue dots to the track’s top, middle, and bottom to attach the lattice. A hardware store can sell lattice molding, which is wooden trim. Glue, the molding board, ends with glue dots. Make sure the top and bottom of the board are flush with the edges by adding a piece of molding. If you add one more panel in the middle, the knives won’t slip out. The blades won’t slip out. A messier and more time-consuming option is to use wood glue and clamps to adhere to the lattice.
Step 8:
Mount the rack with adhesive mounting strips. For mounting the frame to the wall, attach four Command strips in each corner of the board and then stand it up against the wall. Solid wood makes this knife rack heavier, so you may want to use extra-strength mounting strips or place a few extras in the middle.
Step 9:
Place the knives in their slots on the rack and attach them to the wall. Attach the mounting strips firmly to the wall with the mounting strips. For 60 seconds, hold it against the wall. Ensure the knives are in the block for 1 hour before putting them in. If you have trouble remembering which knives go where, label the slots.
The Knife Bag Hangs on The Wall
A knife bag is an excellent option for folders, especially if you carry your knives regularly. Several perfect knife storage bags are available from Zero Tolerance, Benchmade, and Case. Various bags are available, including top-grain leather, vinyl, canvas, and heavy-duty polyester. The bags’ insides and outsides can include materials such as felt, thick foam padding, and a soft cloth for scratch-free storage. It is common for these bags to have adjustable shoulder straps for ease of carrying and zippers or Velcro closures to ensure safety.
How Should You Hang Knives on The Wall?
If you want to keep your knives away from little hands, choose the best knife storage spots in your kitchen. No space is taken up in your kitchen by magnetic knife holders. You can find instructions on how and where to install them in our article if you’re having difficulty mounting them. Over five locations throughout the wall make it convenient and easy to hang knives.
The wall above the stove
The wall above the stove is the perfect place to keep your knives while preparing food on the stove. Hanging knives on magnetic holders above the furnace is not recommended since humidity weakens the magnetic strip’s strength.
The wall on the Top Sink
An easy way to hang knives is by using a magnetic holder. Since children can’t reach the top of the sink, the blades are out of reach. The knife will fall directly into the sink even if it falls from the strip accidentally. Displaying your kitchen knives here can be a great idea. If you use a kitchen knife of any size, ensure the magnetic stripe is strong enough to withstand the force.
Make preparations for installation
Magnetic knife holders come in two types. The first requires screws, and the second uses adhesive behind the strip.
Holder for magnetic knives with adhesive
⦿A magnetic adhesive knife holder works well in a well-furnished kitchen without drilling the walls. ⦿On both sides of the holder, attach a dual-sided command strip. For at least 30 seconds, press it against the wall. ⦿The adhesive material must be strong enough to hold knives of any size. ⦿Magnetic knife holders with adhesive are only disadvantageous because they are difficult to remove from the wall. ⦿You’ll need to buy a new magnetic knife holder if you want to move it to another wall.
Holder for magnetic knives screw-based
⦿Magnetic knife holders based on screws are easier to install and more effective than those found on adhesives. ⦿Using a drill machine, you can apply screws to the magnetic holder if your walls cannot hold adhesive tape. ⦿Ensure you have placed the screws correctly. ⦿Screws in magnetic holders keep the holder tight, so knives cannot fall out. ⦿If you want to change the location of the magnetic holder, you can remove the screws easily. ⦿There are a variety of sizes available for stainless steel knives. ⦿Ensure the surface is drill-friendly.
Frequently Asked Questions
Is There a Good Way to Hang Knives?
After mounting the rack on the wall, place the knives in their slots. Apply a solid grip to the wall with the mounting strips. For 60 seconds, hold it against the wall. You should wait 1 hour before putting the knives in the block.
How Do I Install a Magnetic Knife Strip Without Drilling?
Cleaning and drying of the wall will take place before installation. Make a mark on the rack to indicate its mounting position. Remove the protective film covering 3M double-sided adhesive tape from the back of the shelf. With over a 1mm thickness, apply nail-free glue to the back of the rack.
How Do Magnetic Knife Racks Work?
A magnetic knife holder is a strip of magnetic material attached to the kitchen wall. Their magnetism keeps kitchen knives in place. The magnetic strip makes selecting blades quick and easy because you don’t have to pull them all out to see which ones you want.
Where Should Knives Be Stored?
Knife drawer storage is one of the safest knife storage options you can use at home. Keep knives in a drawer if you need to keep them away from children or pets. However, putting knives in a drawer doesn’t simply mean shoving them in there.
How To Display Kitchen Knives?
You can store your kitchen knives in four primary ways. With a magnetic strip, you can mount them on the wall or store them on the counter in a block or dock, under a cabinet if you don’t have much space, or even in drawers.
Conclusion
It is essential to clean the area properly before mounting a knife strip. If you have an oily or humid atmosphere, use alcohol wipes to remove oil from the surface. Magnetic knife racks won’t work in these conditions.
In the kitchen, you can hang knives in a variety of places. When cooking, choose an area that is convenient for you. Your children can’t reach your blades if you turn them high.
It would help if you chose a safe place to hang the knives. Above or behind the stove, a magnetic knife holder can lose its magnetic properties, as well as its sharpness and handle quality, when the heat from the furnace affects the magnetic properties.


