
If you have a charming chandelier in your room, upward-facing light bulbs can add a more premium appearance than downward-facing bulbs. It is usually difficult to replace bulbs in upward-facing chandeliers since the bulbs are held upward.
It is therefore imperative that you understand how to change upward-facing chandelier bulbs from your ceiling. If you become familiar with the actual process, you can replace the chandelier bulbs by yourself.
Methods Of Changing Upward Facing Chandelier Bulbs
Usually, upward-facing chandelier light bulbs are used on high ceilings. In case the roof is reachable, you can simply change the upward-facing bulbs standing on the top of a chair or a table. Therefore, you do not need any kind of additional tools when your chandelier is lower enough. On the contrary, you need to follow some specific methods to change the bulbs from your upward-facing chandelier.
Using The Upward Bulb Grabber
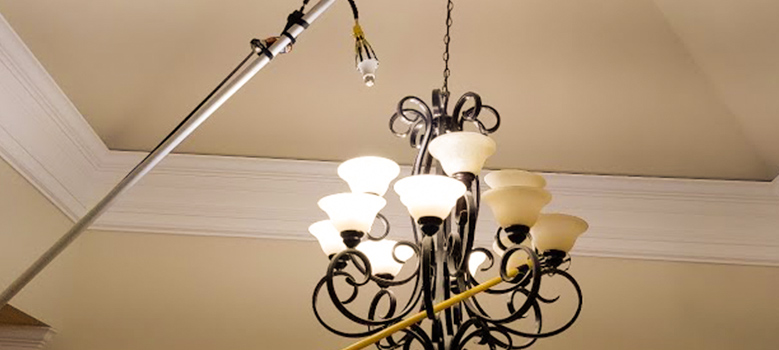
Bulb grabbers are widely used for replacing high-ceiling chandelier bulbs because of the long stick of the handle. Mainly, a bulb grabber can grab any bulb with its sticky holder. Although this may be true, you cannot use a standard bulb grabber for upward-facing bulbs as the regular one supports only downward-facing light bulbs. So, you need a specific bulb grabber that can hold upward-facing bulbs, or you can buy one which can have the grip of both upward and downward-facing types.
- First, you should always turn off the chandelier before working with its bulbs. Besides, we strongly prefer wearing rubber gloves before moving into the bulb-replacing tasks.
- Second, look at the distance between you and the ceiling. If your ceiling is higher than the actual height of the bulb grabber, you need to use the extension pole. To use the extension pole, connect it to the bulb grabber and check if it reaches the chandelier. If not, then you can extend the rod according to your necessity.
- Then, take the bulb grabber near the bulb you want to change. Gently put the grabber on the root side of the bulb and make sure the bulb is getting enough grip from the suitable notch setup.
- Now, you should remember that the upward-facing bulbs should be rotated clockwise to loosen them. So, rotate the grabber clockwise to loosen your targeted bulb. In this way, the light bulb will be unmounted from the chandelier holder.
- After unmounting, take back the grabber below and remove the old bulb from the grabber. Pull the release string to allow the removal of the old bulb and fill the place using the new bulb.
- Once you have attached the light bulb to the bulb grabber in the perfect position, take it near the socket using the extension pole. Don’t forget that you need to place the bulb in the center of the socket before rotating. After placing in the fitted position, turn the bulb anticlockwise to insert the bulb.
- When the insertion is completed, you can pull the release string to release the bulb from the grabber. And, repeat the same process for changing more bulbs of the chandelier.
- Lastly, you can switch on the chandelier to check the bulbs are working. And, you are ready to use your updated chandelier.
Using The Motorized Lift
One of the popular methods of changing upward-facing chandelier bulbs is to install a motorized lift for the maintenance of your chandelier. Once you install that lift, you can use it to bring your chandelier down to replace bulbs or modify the entire setting. As a result, this method can be a permanent solution for your chandelier maintenance.
Not to mention, you need some tools or items to start the motorized lift installation process. These are wire cutters, jigsaw, wire nuts, drill and bits, screwdrivers, and the motorized electric lift itself. After collecting these items, you can directly move on to the steps. If you fear that you may not be able to handle the tools properly, you can consult someone expert for professional help. However, the steps below are enough if you want to DIY and perform the tasks carefully.
- First of all, switch off the chandelier to stop the electricity flow. Now, you need to flip the breaker for further processes.
- Secondly, you need to remove the chandelier from the electrical box. Because disconnecting it from the power source will allow you to work with the hole in the ceiling. This hole is where you need to input an electrical magnetic box.
- Check the upper space of the hole, and you will get an empty space above the ceiling. Sometimes you may need to build a structure to place the motorized winch firmly. All you need to do is mount the winch above the roof.
- At this stage, you need to give an electricity connection to the lift. And, the wires should be connected to the chandelier too. The point often overlooked is that you need to connect the low-voltage wires between the circuit board and the winch.
- Now, use the low-voltage wires to bring down the connection from the winch and attach it to the electric motor. In that case, you may need the help of a screwdriver. After making the connection, you can cover up the winch to screw the low-voltage ring with the main switch.
- Next, bring the lift down for testing and use wire nuts to connect the chandelier to the plates. When all the steps are maintained according to the instructions, you can turn on the chandelier.
- Finally, you can directly lower the chandelier by switching the lift button. And, you don’t need to worry about changing the upward-facing light bulbs in your high-ceiling chandelier. Simply, bring the chandelier down to change the upward-facing bulbs manually.
Conclusion
In most cases, replacing upward-facing chandelier bulbs may seem tricky because of the reverse positioning of the bulbs. But the fact is that you don’t need any accessories if you have a motorized lift installed for your chandelier. If the chandelier is low enough, you can remove the bulbs manually, but if the ceiling is very high, you’ll need an upward-facing bulb grabber.


