Nest Protect for residential use includes smoke and carbon monoxide detection. A photoelectric sensor detects slow, smoldering fires and has multiple sensors to determine what’s happening in the house. It may be necessary to remove the Nest Protect from the wall or ceiling at any time due to any problems. You may feel this is a complex process. But it’s easy. In a few minutes, you can remove your Nest Protect. Here are the steps you need to know.
Nest Protect from Wall: How to Remove It
You’ll receive an advance notification through the Nest app. The messages will show you when your Protect will need to be replaced and remind you when it will stop working soon. In the app, ‘Expiring soon’ will appear.
Considering the short lifespan of CO sensors, protection needs to chirp once the sensors expire or fail. You’ll receive reminders long before the expiration date of your Protect to remind you to replace or remove it.
What to Know Before You Remove Nest Product
If the Nest Product was initially installed in an app, delete it. For example, remove the thermostat you initially set up with the Home app. Check the other app if you cannot remove it from one app or cannot find your product there. After removing it from your account, Nest Protect still sounds an alarm when smoke or carbon monoxide levels exceed specified levels. However, some features will be unavailable: As like,
⦿In the Nest app, you will no longer be able to view the Nest Protect’s last reported status.
⦿You cannot change any settings in the Nest app.
⦿The Nest Protect will no longer send push notifications.
When to Remove Your Nest Protect
Protect Expiration:
⦿ Carbon monoxide (CO) detectors have a limited lifespan, so they all expire. Depending on certification standards, second-generation Nest Protects must be replaced after ten years, while first-generation Nest Protects require replacement after seven years.
⦿ Protect’s certification standards require the device to chirp when its CO sensors have expired or failed due to their limited lifespan. Your Protect will send you a reminder long before its expiration date so that you don’t forget to remove it.
⦿ If you do not replace your Nest Protect when it expires, you are no longer protected from smoke or carbon monoxide.
Sensor Damage: It is possible to damage Protect’s sensors by-
⦿ Fire or flooding in a building is considered a significant incident.
⦿ Soaps or detergents (such as glass cleaners) are also substantial incidents.
⦿ Paint, air fresheners, hair spray, and other aerosols or vehicle exhausts are other chemicals.
The Best Way to Remove Nest Protect
Step 1: Find the breaker in the main panel to turn off the Nest Protect circuit. When you do this, the Nest Protect on the course might start chirping, and if it bothers you, do not worry about it. The work will not take long.
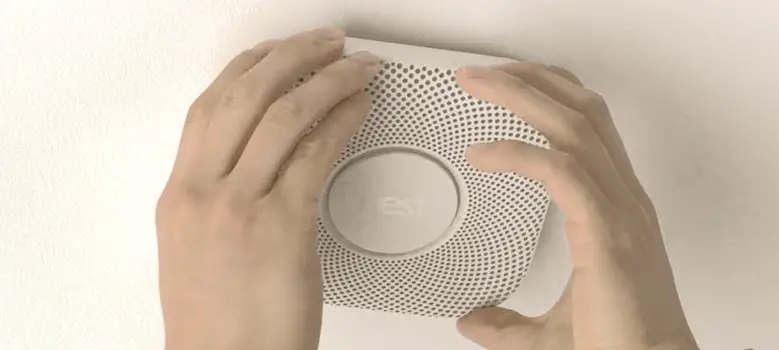
Step 2: To reach the Nest Protect comfortably, climb a tall stepladder. To detach it from the mounting plate, grasp it with one hand and turn it counterclockwise. If it is plugged in, unplug it.
Step 3: It is necessary to disconnect the wires if the Nest Protect is not plugged in or if you are upgrading the model. Insert the probes from a voltage tester into the cap containing the black wires and the ground wires of the electrical box. Remove the wire caps from the electrical box. Disconnect the circuit wires from the Nest Protect wires if the light is still on after removing the wire caps. Remove the Nest Protect from the wall. You can also replace a plug by following the same process.
Step 4: You can replace the Nest Protect by unscrewing the mounting plate from the wall. Mount the new mounting plate on the wall by screwing the ring in the middle.
Step 5: The black hot wire on the new plug or alarm should be turned clockwise in conjunction with the circuit wires, and then the wire cap must be screwed on tightly. Continue by connecting the neutral wire, which is white, and the ground wire, which is green or bare. Into the wall box, push the wires. You may find a plug adapter that works and will spare you the trouble of wiring if you replace a plug-in model with a different type.
Special Notes
Before proceeding, turn off the detector’s circuit at the main electrical panel. You will then need to remove the old sensor from its mounting on the ceiling or wall. As you detach the three wires from the old smoke detector, take note of the following: black represents 120V power, white represents neutral, and red or yellow represents the interconnected circuits.
Remove any wiring harness from your home and the previous mounting plate if the wires are contained inside a plastic plug. Connect the newly-installed wire harness to the house’s black, white, and red cables by matching up the connections. Connect the metal wires as soon as possible, twist them evenly to ensure a strong bond, and then tape them or cover them with electrical tape.
How do I remove my Nest Protect?
Re-doing the wiring is the most challenging part of replacing or removing a Nest Protect. The process is still not complex, even then. You need to replace the wiring harness. It’s pretty simple to follow these steps:
Ensure the power is off. ➦If it’s not loose, twist it to loosen it ➦Remove the wiring harness from your smoke alarm➦Remove the screws holding the mounting bracket➦Take off the mounting bracket➦Connect the new wiring harness to the old wiring harness➦Wire the upgraded harness in place➦Wrap the wires around the device➦Mount the updated bracket➦Replace the old smoke alarm with a new one➦To secure the upgraded smoke alarm, twist it.➦Turn the power back on➦Ensure that your smoke alarm is functioning.
With Nest Protect, you can easily change the device – just remove the old one and replace it with the new one. The wiring of hardwired smoke alarms enters the home’s circuitry. If the Nest Protect does not already come with a pre-wired plug, you may need to know about electrical wiring.
Caution
Don’t do anything you aren’t qualified to do regarding electrical work. Here is just a quick overview. There are many disclaimers in the manufacturer’s installation instructions. The specific unit may require more steps, so read the instructions carefully.
Frequently Asked Questions
How Does Nest Protect Attach to Wall?
In cases where the electrical wiring box isn’t flush with the wall or ceiling, attach the backplate directly to the wall with the drywall screws included in the Nest Protect box.
How Do I Reset Nest Protect for A New Owner?
Hold the Nest button for a few seconds to reset your Nest Protect. You will hear a chime and see a blue glow while holding the button. Release the button after Nest Protect speaks its version number.
How Do I Stop My Nest Protect From Chirping?
On the home screen, select ‘Nest Protect.’ Click the settings button in the top right corner. There are different alarm options available. Silencing alarms are available. To turn off App Silence, turn the switch on. In the future, simply turn the switch to enable App Silence again. Go back on.
When Will the Nest Protect Expire?
There is a limited lifespan for the sensors on carbon monoxide (CO) alarms. It is mandatory to replace a Nest Protect 2nd generation after ten years, and a Nest Protects 1st generation after seven years to meet certification standards.
Conclusion
If you are prominent and know how to climb a ladder, you can remove Nest Protect from the wall. It will be super easy to get the same model as your old one since they use a unique plug. It may be possible to unplug the old one and plug in the new one. Changing plug-ins for a different model is still reasonably easy since three wire nuts must be undone and replaced. Make sure the colors are the same (reds, blacks, and whites). Turn off the circuit breaker and make sure your wires are not energized! Keeping safe around cables and voltmeters is easy with a proximity voltage detector.