
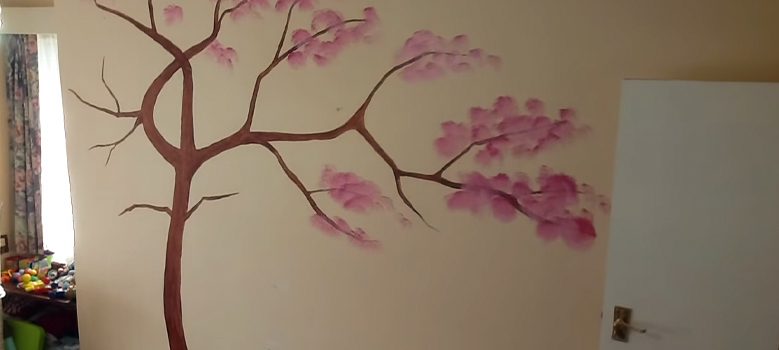
When you’re tired of looking at corners, or if you’ve ever wanted to paint a tree in the corner of your room, this guide is for you. We’ll walk you through the steps on how to paint a tree on a wall corner in your condo using acrylic paints and stencils. This project will take about four hours total, but it can be done faster with more experience and better supplies.
How To Paint A Tree On Your Wall Corner
Painting on the walls is one of the popular methods of decorating a room. When talking about such a type of decoration, you can paint anything on the walls, including corners. If you have a corner in your home that looks a little bare, don’t worry. Painting a tree on it won’t take much effort and will bring a whole new level of life to an otherwise dull space.
You can use any color or pattern for this project. Just make sure to use easily washable and not too glossy paints, as they can make cleaning difficult later on.
During the course of your project, you will need the following materials:
- Paints (these can be any color you like, but it is best if it’s a shade that matches your wall)
- Paintbrushes (one that is as thick as the wall corner is wide)
- Paper towels or rags to wipe off excess paint from the brush
- Tape measure or yardstick to make sure you get the right size tree and placement on the wall
- A pencil so you can mark where you want to put your tree in your corner
- Masking paper to use for masking off areas you don’t want to paint
- A ladder and a level when you are painting the ceiling or upper side along with the corner
After arranging the above materials, follow the below process step-by-step to complete the painting process.
Step #1 – Fixing Location
In order to paint a tree on a wall corner, you will need to find a spot that is visible from the main entrance. You should also choose a corner with no windows or doors so that nothing is blocking your view of the tree. Besides, it should be in an area where there are no furniture items or other objects in the way.
Step #2 – Sketching
The second step is to draw a rough sketch of your tree. Use a pencil to outline the shape, and then use a ruler to ensure that your lines are straight. If you don’t have one, use any flat object with parallel sides, like a book or piece of cardboard, to draw with instead. This is where the plan comes in! You should have already decided how big you want the tree to be, so now you can sketch out its branches and leaves accordingly.
Step #3 – Start Coloring
The first color is the base of the tree. The base should be darker than the final color, and it should be a shade of green. To create streaks of color when painting the first coat, use a brush in circular motions to apply the paint.
Step #4 – Painting the Second Layer
Now you’re going to paint the second color. This is the highlight color and is often lighter than the first one you painted. The easiest way to do this is by using a small brush with a pointed tip that will allow you to get into all of those little nooks and crannies in your design.
Step #5 – Final Coloring
The third and final color is the most important. It should be darker than the previous one, but not as dark as the first color. The tone you choose will depend on your preference, but it’s ideal to find a shade of green or blue that goes well with the rest of your house. This is also an opportunity to show off some texture, so make sure you use a paintbrush with enough bristles to show off all those imperfections!
Not to mention, this step won’t take long at all. Go over everything again with this lighter color again before moving on to Step #6.
Step #6 – Detailing
After you have finished the painting, it’s time to clean up and remove the tape. If you made a mistake, don’t worry! You can fix it by lightly sanding the area with a fine piece of grit sandpaper, then repainting over it. In case there are any areas of your wall where paint has splattered outside of your lines, use a rag dipped in soapy water, including dish soap, or an old t-shirt with some nail polish remover on it to wipe off excess paint.
Finally, allow your project 24 hours before putting anything else on top of it. This gives everything time to dry thoroughly and ensures that there aren’t any issues with moisture seeping through later on down the road.
Frequently Asked Questions and Answers
How Can I Paint A Tree On A Nursery Wall?
The best way to paint a tree on a nursery wall is with a stencil. As a matter of fact, most nurseries are painted white or cream, making it easy to choose the perfect color for your tree. And, stencil kits are available at most hardware stores. If you don’t want to buy an entire kit, try using a free printable stencil. Simply print out the image and paint using that stencil.
How Do I Paint A Pine Tree On A Wall?
Actually, there are several ways to paint a pine tree on your wall. Firstly, you can buy a pre-made replica of a pine tree, which will come with instructions on how to install it on your wall. Secondly, you can create your own pine tree out of paper Mache and papier-Mache paste. This method is inexpensive and easy but requires patience and an artistic eye.
Finally, the third option is to use existing artwork to create your pine tree. If you have a painting hanging on your wall that features a pine tree, you can simply print out an image of it and attach it to your house with double-sided tape or similar adhesive. Otherwise, use it as a stencil of a pine tree for the painting.
How To Paint Circles On A Corner Wall?
To paint circles on a corner wall, start by drawing a small circle in the center of the wall. Then, use a ruler to draw a line from the center of the circle to the top left corner of the wall. Next, draw another line from the circle’s center to the bottom right corner of the wall. Finally, use a paintbrush to fill in the circle with paint. As you paint, add additional circles of different sizes around the first one. Once you’re finished, step back and admire your work!
Conclusion
In this written tutorial, we’ve shown you the process of painting a tree on a wall corner. You can first take an image of the leafy branch and cut it out with scissors. Then, take a pencil or marker and mark where each line ends on your paper. You can use this shape as a stencil for painting and make the tree painting perfect!


