
With a garden of imagination, kids often think of creating a dollhouse that resembles a real house. Whether you are a fan of these types of projects or want to assist your child by making one, you may need to make a chandelier for the dollhouse. Anyway, without knowing how to make a dollhouse chandelier, you won’t be able to assist your kid to fulfill the imagination. It is therefore wise to learn how to make this tiny chandelier before you contribute to your child’s miniature project.
How To Make A Dollhouse Chandelier
Understanding that the dollhouse chandelier is some kind of miniature project, you may find the working process a tough job. However, there are many techniques you can follow to construct a dollhouse chandelier. One thing, you should keep in mind is that the dollhouse chandelier can be both electrical and non-electrical. If you don’t want to involve any electricity in the project, a non-electrical chandelier is the best fit for your little kid.
On the other hand, you may want a chandelier not only to look just like a real chandelier but also to work like a real one sometimes. In that case, you should follow the electrical method for the project. It’s a pleasure to inform you that we’ll cover both of these techniques.
Non-Electrical Dollhouse Chandelier
It follows a simple method that requires no electricity and is the best option for young children. Furthermore, if you are a beginner to such types of miniature projects, the non-electrical chandelier is an excellent choice. In fact, you need to do a few things first before you can get started. These are polymer clay, some jewelry-making supplies like little end beads and wires, and a piece of wooden cork.
To arrange the polymer clay, you can buy a little piece of this cay type from any nearby market. Usually, polymer clay is translucent in characteristics. However, we suggest getting one that has a fluorescent feature too. After collecting all the necessary elements, you can now move on to the main process.
- First, start with the baking of the polymer clay. Though you can use your oven to warm up the clay, follow the specific instructions from the packet of the polymer clay. Because different clay packets can have other methods for baking the clay.
- After baking the clay, when the clay is loosened enough, start working with the shape. If you are able to create any shape using the clay now, cut it into five equal pieces. Now, turn these pieces into little balls, and you must keep your hands washed at this instant.
- Next, add an end bead to a clay ball. And, give a light-like shape to the ball. After that, use a pencil and push through the end bit to make a tiny hole. Now, repeat the entire process for the other four balls.
- At this stage, all your light-shaped clay balls are ready. So, insert a tiny wire into the lampshade of a ball. Repeat the insertion for each ball. Now, keeping the wires attached, you need to bake the balls again.
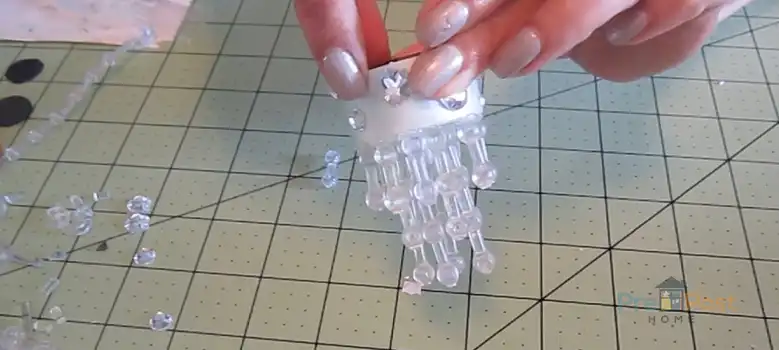
- When the clay lights are baked, you should cool them before further use. After cooling off, attach them together like a chandelier.
- Now, add a piece of wooden cord to the wires. This cork piece should look like a chandelier frame. After putting the wires through the cork piece, bend them to secure more. And, your dollhouse chandelier is ready now.
- Lastly, you can glue the clay-made chandelier into the ceiling of the dollhouse. The chandelier should look fine in any room of the dollhouse.
Electrical Dollhouse Chandelier
In this method, you’ll make a miniature chandelier that also works as an actual chandelier. That means, there will be electricity flowing through this chandelier. For this reason, you should never put such chandeliers in the dollhouse of your little children. After being sure that the kids are trusted about handling the electrical component, you should make a move in this project. Otherwise, go for the non-electrical method.
Here, you need some plugs, a 12-volt electric bulb, some beads, cord wires, pieces of necklace chains, and tiny crystal chains to accomplish the project. After arranging these things, you should maintain the following process for completing the project.
- To begin with, connect the cord with the plug. Then, remove the pins from the plug. Now, you’ll get two wire ends in the place of plugs. And, you need to put the wires to the separate holes of the pins.
- Second, connect the tiny 12-volt electric bulb to the cord. Use a bid to go through the opposite end of the cord till it reaches near the bulb. This bead will cover the bulb. Now, attach a pin string to give the bulb a steady structure.
- Third, take a necklace chain and put it with the cord by twisting the pin. As the sides of the bulb are still open, you need to put some hanging near the sides of the bead. Here, you can use some crystal chains and attach them to the bead straightway.
- After hanging all the crystal chains, the bulb will also be covered from the sides. Now, put the cord back into the plug and assemble the pieces again. Now, your dollhouse chandelier is ready to be used. So, insert it into the ceiling of the dollhouse and plug it in to turn on the light. This way, the chandelier works exactly like a real electric chandelier.
Final Words
Generally speaking, you can easily make a dollhouse chandelier by following some simple steps. However, you should choose the type first. If you want to make a non-electric chandelier, building a structure like a real chandelier is enough to bring a similar look to the dollhouse ceiling. But, the electrical chandelier includes wiring and electricity connection. As a result, you should only do this when there is no risk of causing your children harm.


