
Beautiful crystals that shimmer when light may be found within many caves. Several crevasses exist in other dark, filthy caverns where insects and other tiny creatures can hide. You may design the inner cave wall for a simulation, ornamental scene, or stage setting, whether the cave you wish to imitate is real or a creation of your own.
Also, the fake cave walls would be a mind-blowing addition to your house this Festive season. Lightweight cave scenery may be made using low-cost materials like paper mache, polyurethane foam, or plastic wrap. So let’s look at how you can make simple yet mindblowing fake caves and cave walls.
Things You’ll Need To Make an Artificial Cave
Whether you make an artificial cave or just a designer cave wall for your house decor, these are the possible things you will need. Always take safety measures while working with tools and electrical hardware.
Tools Required
- Saw, Circular
- Portable Drill
- Vacuum Cleaner
- Hammer, Level, Jig Saw, Sawzall, and Tape Measure
- Marker Sharpie
- Equipment for spraying foam
- Ladder
- Temporary illumination
- Electronic devices
- Experience with electrical systems
- Understanding of retaining walls
Materials
- Plywood
- padded tiles
- Spray paint is fantastic. Foam, Screws, and Windows if needed.
- Constant illumination
- Electrical outlets, boxes, switches, wiring, and breakers
- electronic tape
- Cable nuts
Required Safety Equipment
- Safety lenses
- Protection glasses
- In-ear plugs
- Gloves
- Knee pads, a half-face OV/HEPA cartridge-style respirator, appropriate shoes, and bandages are also recommended.
Making a Fake Cave Wall
It’s also a rather straightforward and cost-effective method of party décor if you want to improve the mood in your home for a spooky event. Once you’ve built the entire cave walls, you may get extremely inventive by hanging bats, spider webs, or even skeletons to frighten people from your cave.

Using Sheets
Step 1: Decide which rooms or parts of the house will receive the most cave-themed decor. Per room, pick at least one wall for extensive cave-style decorations. Use the tall bookshelves, high-backed chairs, and high curtain poles in the areas where you have them to hang your cave walls. If required, move bookshelves and other tall furniture so you can hang cave-style draperies if you’d rather not leave marks on the walls.
Step 2: Decide where you should install the brackets on your walls by measuring them. This will allow you to attach more curtain rods over entrances, along the top of the walls, or wherever you want to hang additional “cave walls” made of sheets. Locate studs with a stud finder, then position your curtain rods properly. To hold the bracket and curtains rods, drive in screws.
Step 3: Scrunch or fold the sheets together while you spread them out on the floor to make several haphazard folds and wrinkles. Spray the sheets with a thick layer of starch when severely crumpled. You should spray the sheets with starch until they are soaked, using twice as much as you would for regular laundry.
Step 4: Allow the sheets to dry fully. If needed, speed the drying process by opening a door or putting the sheets outdoors. Use hooks and clip attachments, and fasten the sheets to the curtain rods. Cover tables, chairs, bookcases, and other furniture with sheets. Include ornaments such as fabricated spiderwebs, bats, cobwebs, and skeletons. Place candles or little lamps around to produce dramatic illumination and highlight the rugged nature of the cave walls.
Using Paper
Step 1: Cut paper rolls into lengths that extend higher than the height of your walls. To make haphazard folds and wrinkles crumple the paper. Longer crumplings will result in a finer-textured cave wall surface, whereas fewer, bigger folds will provide a ragged appearance.
Step 2: Spread out several pieces of sticky putty equally on one surface of your paper. If required, use a ladder to place the paper’s tip against the top of the wall. Put pressure on the putty by pressing the form firmly against the wall. If additional putty is required, add it to ensure that no sections are collapsing or peeling away from the wall.
Step 3: To make an existing cluster of undulating curves, hang cotton gauze garland in repeated rows around the ceiling. To resemble stalactites, let some crepe paper dangle horizontally.
Making an Artificial Cave
As kids, we all wanted a place of our own, where no one else would invade, or just a personal space to let all our imagination run through. Maybe this is why I, you, and all of us made caves or forts out of all the random stuff we could find. We constructed a building, a car, a rocket ship, etc., out of cardboard boxes.
So let us get into some simple steps for you to follow to make an artificial cave in your attic or wherever you find it workable. It can be a great gift to the kids and a space for you to zone out from time to time.
Organizing the Area
So let’s choose the area, get rid of everything, and tidy up this area a little. Trash bags, dust masks, mitts, a lot of soap, a huge shop vac, and plenty of time should all be sufficient. You can pay a neighborhood youngster to complete the work. Giving the child some money to go on a Jamboree excursion will save you time and money.
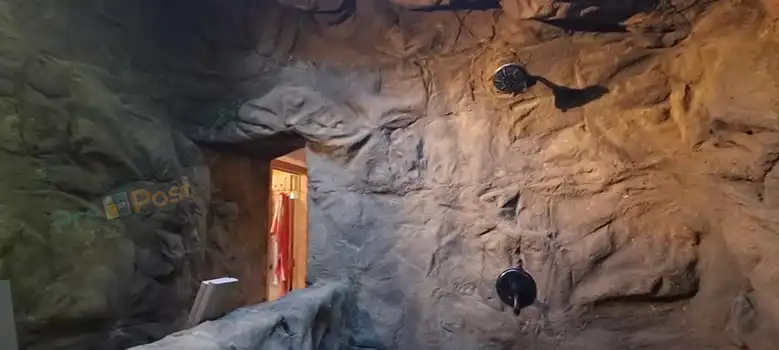
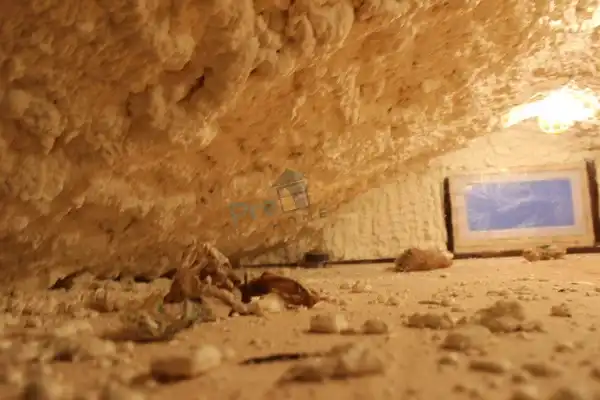
Window Addition
If a fire were ever to start, you would need a way to get out. Who wants to be confined in a tiny area engulfed in flames?
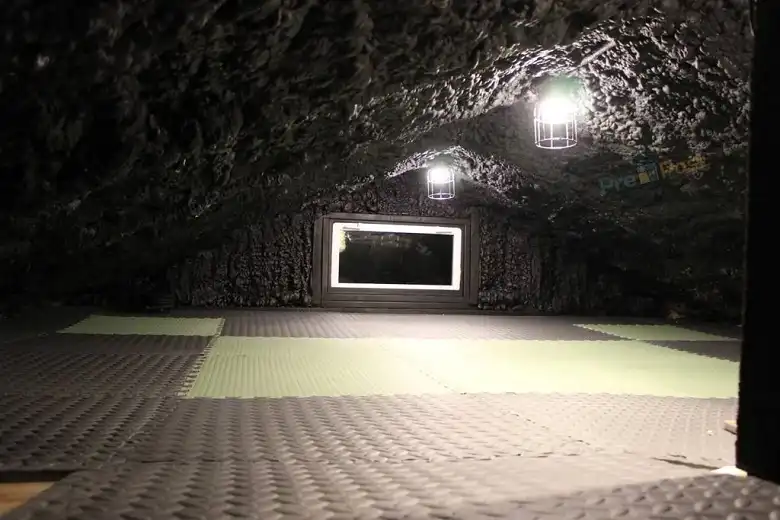
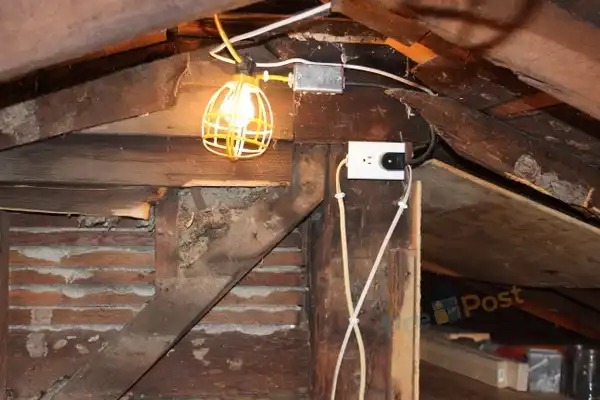
Include Lighting
Who desires to be alone in a pitch-black cave? Sure, there could be occasions for that, but generally speaking, it’s not a good idea. You can install three lights on the ceiling of the cave region after running electrical power there. The button to turn them on is right inside the entrance to the chase going to the cave.
Ventilation
A supply of fresh air is required for the cave area. You shouldn’t rely on expecting the air will get through by leaving the little door open.
Flooring
It would be best to lay down half-inch plywood as the floor covering.
Insulation
Any local business can install closed-cell spray foam insulation. Allow them to cover the studs with foam to enhance the cave-like appearance of the space after explaining to the person what you want to do with it. The insulation effectively transforms the space area into a huge Styrofoam cooler.
Painting
You may use a Capspray HVLP spray gun to paint the entire item with flat black latex paint. You’ll get a rubbery sensation on the foam reminiscent of a cave.
Flooring
On a rough wooden surface, who wants to lie down? That seems rather boring. But a floor has foam tiles. You could certainly crawl around on that.
Conclusion
You may read the article to discover how to construct a sizable, temporary cave-like rock wall or make an artificial cave. This wall is excellent for use as a prop in plays and other programs and for decorating special events. Let your imagination run free; this is only a guide. This is one specific way the cave or the wall was constructed, but you may modify it to do your unique project.


