Having pipes in exterior walls can lead to freezing and bursting during cold weather. Properly insulating these pipes is crucial for protecting your plumbing system. As a homeowner, learning how to insulate exterior wall pipes is an important DIY skill.
In this article, I’ll walk you through the step-by-step process I use to insulate pipes in exterior walls.
What You’ll Need?
Before we start with the step-by-step process of insulating your exterior wall pipes, here’s what you’ll need:
- Fiberglass pipe insulation with adhesive backing
- Foam pipe insulation
- Tape measure
- Utility knife
- Tin snips
- Spray foam sealant
- Caulk and caulking gun
Step 1: Measure and Cut the Fiberglass Insulation
First, locate all the pipes in the exterior walls that need insulation. Use the tape measure to measure the length and diameter of each section of pipe. For the fiberglass insulation, cut pieces that are slightly longer than each section of pipe. The extra length will allow for overlap. Use the utility knife or tin snips to cut the fiberglass insulation to size.
Step 2: Wrap the Pipes in Fiberglass Insulation
Starting at one end, wrap the fiberglass insulation around the pipe. Make sure the adhesive side sticks firmly to the pipe with no gaps. At joints and elbows, use short pieces to fully cover the bend. Where sections meet, overlap the insulation by 2-3 inches.
Step 3: Fill Gaps with Spray Foam
At joints and elbows, spray foam sealant can help fill any small gaps and prevent air leaks. Apply spray foam and let dry completely. Use a utility knife to trim off any excess.
Step 4: Cover with Foam Pipe Insulation
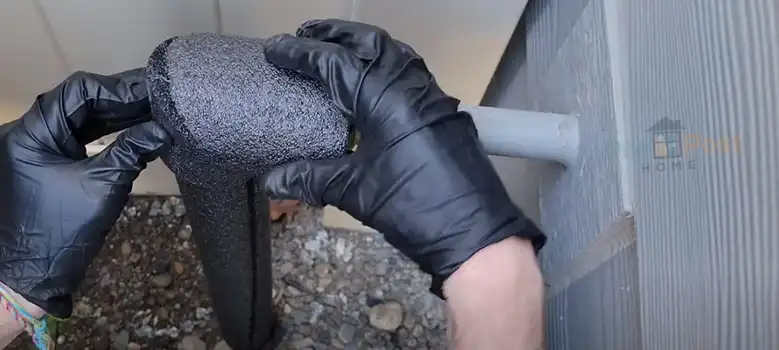
For extra insulation, wrap a layer of foam pipe insulation over the fiberglass. Using a utility knife, cut slits in the foam to fit snugly over pipes and joints. Seal the seams with caulk or spray foam.
Step 5: Caulk All Seams and Cracks
Finally, go over all seams, joints, and ends of the insulation. Apply a generous bead of caulk to seal any cracks or gaps. This helps prevent air leaks that could reduce the insulation’s effectiveness.
And that’s it! Following these simple steps will properly insulate your exterior wall pipes. I recommend checking the insulation yearly and resealing any new gaps or cracks. Proper insulation will prevent pipes from freezing in winter and help reduce energy costs from heat loss year-round.
Additional Tips
- If you are unsure about how to insulate your pipes, it is a good idea to consult with a professional plumber.
- It is important to insulate pipes in both hot and cold water lines.
- Insulating your pipes can help to reduce your energy bills and make your home more comfortable.
Frequently Asked Questions
What R-value insulation should I use?
For exterior wall pipe insulation, an R-value of 3 to 5 is recommended depending on your climate. Fiberglass and foam pipe insulations typically have R-values in this range.
Should I insulate hot and cold water pipes differently?
Both hot and cold water pipes in exterior walls should be equally insulated to prevent freezing in winter. Extra insulation on hot water pipes can also reduce unwanted heat loss.
Can I use pipe insulation alone without fiberglass?
Wrapping pipes in fiberglass first provides better coverage and support. The outer foam layer further boosts the R-value. Using just foam alone often results in gaps that reduce effectiveness.
What if I can’t access the pipes from the wall interior?
For inaccessible pipes, you can remove siding/wall material from the exterior to wrap insulation around the pipes. Make sure to properly seal the outer wall covering when done.
End Notes
Insulating exposed pipes in exterior walls is one of the most important things you can do to protect your home’s plumbing. Following this step-by-step guide, you can properly insulate pipes yourself. With the right materials and techniques, your pipes will stay warm and safe from freezing all winter long. Let me know if you have any other questions!


