Whether you’re an avid skier or just someone who appreciates a nice set of skis, there’s no denying that they make for excellent wall decoration. However, if you’ve ever tried to mount a pair of skis on your wall, you know it can be pretty tricky. That’s why we’ve put together this ultimate guide on how to mount skis on walls of your home. With our tips and tricks, you’ll have those skis up in no time!
How To Mount Skis On A Wall?
To mount skis on your wall, you will need a pair of skis and ski mounts. You can do it with other materials or items, but this is how to do it best. Let’s see why:
Skis: When mounting skis on the wall, you want them to be strong enough so that they will not fall down when you walk into the room or get bumped by someone walking by your door. The best way to ensure this happens is by getting a good quality pair of skis that have been used before and tested by professional skiers who know well about the durability of skis.
Ski Mounts: It’s essential to get strong mounts so that they don’t slip off the wall after attachment. Because, there may be people walking around who could accidentally bump into skis too hard, causing them to fall. As a result, skis can break, hampering the decoration.
After arranging the skis, required ski mounts, and some screws of your choice, you can follow the below steps to complete the mounting process:
Step 1: Attaching The Skis
Start by attaching the two skis together. Use screws, washers, and nuts to fasten them. Make sure they are tight. Don’t tighten with tools, as this could cause damage to your wall or skis. Also, be careful not to overdo it. If you feel like it’s too tight after tightening up one ski, try loosening it slightly before tightening again. In such a way, there will still be room for adjustment later on if needed, and you’ll always find this helpful.
Step 2: Aligning The Holes
Make sure that the holes on your skis and ski mounts are aligned with each other. You can use a screwdriver, but it’s easier to use your fingers. Use a level to check for alignment. Be careful not to damage anything.
Step 3: Putting The Screws
Next, put all screws through the holes, locking in each layer. Start with the nuts, then add washers and finally screws. Make sure all are tightly attached. Then, use your screwdriver to tighten each layer of screws. Make sure every screw is tight before moving on to the next step. If you’re having trouble getting all these screws lined up so that they’re facing in the same direction (usually clockwise), try using a tool like an Allen wrench or socket set to help guide them into place. You can even use something like pliers instead of just your fingers.
Step 4: Removing Protective Plastic
Remove the protective plastic from both ends of the ski mounts and place them into the lots of your skis. Tighten as much as possible with your hands. Do not use tools to tighten; that can strip the threads made for skiing, which are not easily replaced at home.
Step 5: Tightening The Knob
After that, you need to tighten the knob on top by hand. You should be able to hold higher pressure on this mount, so make sure you tighten it well. Don’t use tools like screwdrivers or pliers because they can strip out the threads. And, ensure the holes in the wall are tight enough to hold the screws attached to the skis.
Step 6: Mounting On Wall
After finding an appropriate spot for your mounted skis or a ski rack, secure one of them to the wall with screws or anchors. The requirement of screws and anchors will vary depending on what type of mount you are using. Next, place your skis onto their respective bindings, which should already be attached to each other by way of straps. Now, tighten them up until they’re snugged into place. Finally, the mounting process is now completed!
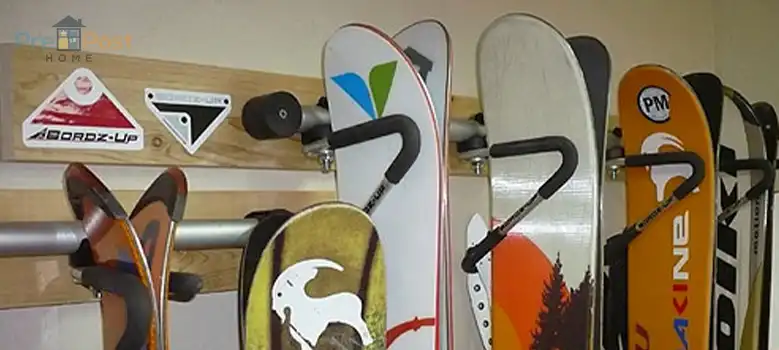
How Do I Hang Skis On the Wall?
We know, ski racks are essential to any ski enthusiast’s home. The process of hanging skis on the wall can be a bit tricky, but it is not difficult to do.
Step 1: Determine where you want to hang your skis. You should ensure that there is enough room for your rack and for you to walk around it comfortably.
Step 2: Decide what type of rack you want to use. Several options are available, including ceiling or wall-mounted racks and floor-standing racks. You can also choose between wood, steel, or plastic construction materials.
Step 3: Purchase your ski rack from an online or local retailer and install it according to the instructions provided with the product package. Lastly, hang your skis on the hook and let them rest until you want them again!
Frequently Asked Questions
How Do I Mount Vintage Skis To The Wall?
To mount vintage skis to the wall, start by using a stud finder to locate the studs in your wall. If you’re hanging something heavy, like skis, it’s best to use anchors and screws to hold them up securely.
- Once you’ve found the studs in your wall, drill an appropriate-sized hole for the screws and then install them into the wall. Make sure that they are secure before continuing with this project.
- Next, take your vintage skis and place them over the top of the screws so that they stick out from the wall. Now take some scrap pieces of wood and glue them onto either side of each ski so that they can hang freely from above. Here, you can use hardwood to get the best result.
How To Decorate With Old Skis?
If you’re lucky enough to have a pair of old skis hanging around, you may wonder how to display them. Here are some ideas:
1. Mount them on a wall. It’s not very complicated, but it does require some tools and time to get it right. You’ll need a drill, screws, and hooks for mounting. Not to mention, you’ll need hanger bolts if you’re mounting on drywall.
2. Use them as a coat rack by attaching them to the wall with hooks at the top of each ski blade. This is an excellent idea if your kids have outgrown their skis but want to keep their memories alive by hanging their gear on the wall like trophies.
3. If you have room in your garage or workshop, mount them horizontally above a workbench where they can serve as a reminder that winter is coming soon enough!
How To Hang Water Skis?
Follow the below process to hang your water skis:
- Place your water skis on a flat surface and allow them to dry completely before storing them.
- Dry-fit the bungee straps so that they can be adjusted to fit your skis.
- Make sure that the buckles are facing away from each other, and then place one strap over each ski tip, with the loops facing outwards.
- Pull each end of the strap through its respective buckle. And, adjust them until it is tight enough not to slip off but loose enough to remove by hand.
- Tuck any excess strap into the open loop of its buckle until it is flush against the ski tip and then secure it with a zip tie or elastic band if possible so that it does not flap around when you are in use. Besides, you can easily hang these water skis using that loop.
Last Words
Ultimately, it can be said that skis are not only great for getting you down the slopes, but they also make excellent wall decorations. If you want to spruce up your home or office with winter-themed decor, consider mounting your skis on the wall. It’s a relatively simple process that’ll give your space a unique, outdoorsy feel. So grab your skis, and let’s get started using our above mentioned technique!