Vinyl plank flooring has gained immense popularity over the years due to its durability, versatility, and ease of installation. Whether you’re a DIY enthusiast or a homeowner looking to save on installation costs, this guide will take you through the step-by-step process of installing vinyl plank flooring. In short, you have to prepare your space by clearing the room and ensuring a clean, level subfloor. Acclimate vinyl planks for 48 hours, measure and plan your layout, add underlayment, install planks while maintaining an expansion gap, cut as needed, and finish with transition strips. So, what are you waiting for?
Materials and Tools You’ll Need
It is not only in this case, but in all other cases that you need to prepare all the necessary things that must be used or can be used in a DIY task. Therefore, before you begin, gather the necessary materials and tools –
Materials
- Vinyl plank flooring
- Underlayment (if not attached to the planks)
- Adhesive (for glue-down installation)
- Transition strips
- Spacers
- Tapping block
- Utility knife
- Measuring tape
- Chalk line
- Pencil
- Safety glasses and ear protection (for power saw use)
Tools
- Utility knife
- Tape measure
- T-square
- Circular saw or vinyl plank cutter
- Rubber mallet
- Hammer
- Flooring roller (for glue-down installation)
- Notched trowel (for glue-down installation)
Complete Step-by-step Guide for Installing Vinyl Plank Flooring
Vinyl plank flooring offers an ideal blend of durability and aesthetic appeal, making it a popular choice for homeowners. This comprehensive guide will take you through each crucial step of the installation process. From preparing your space and acclimating the vinyl planks to the precise measurements and planning that ensure a flawless finish, you’ll learn how to achieve a professional-quality installation. Discover how to create a seamless and attractive floor, one step at a time.
Step 1: Prepare Your Space
Start by clearing the room of all furniture, appliances, and any other obstacles. Remove old flooring material, ensuring that the subfloor is clean, dry, and level. Repair any damage or unevenness in the subfloor, as it can affect the final appearance and performance of the vinyl planks.
Step 2: Acclimate the Vinyl Planks
Allow the vinyl planks to acclimate to the room’s temperature and humidity for at least 48 hours. This helps prevent expansion and contraction issues after installation.
Step 3: Measure and Plan
Measure the room’s dimensions and calculate the square footage to determine how much flooring you need. To avoid ending up with narrow strips at the edges, plan your layout carefully. You might need to cut the first and last rows of planks to ensure an aesthetically pleasing appearance.
Step 4: Install the Underlayment
If your vinyl planks don’t come with an attached underlayment, you’ll need to install one. Underlayment provides a moisture barrier, reduces noise, and creates a smoother surface. Roll out the underlayment and trim it to fit, ensuring it covers the entire floor area.
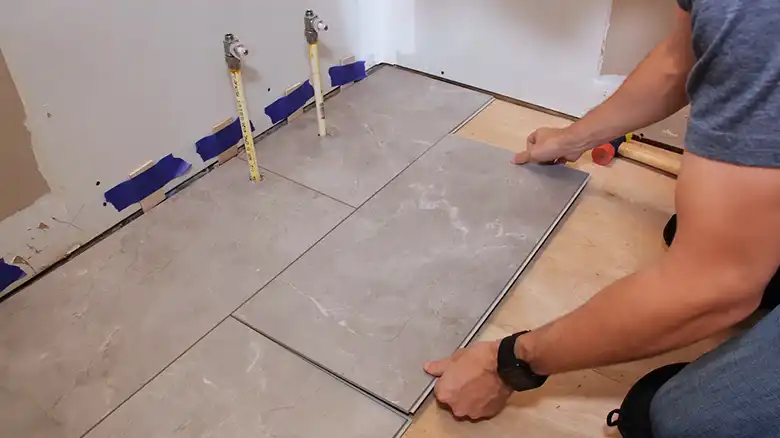
Step 5: Start Laying the Planks
- Begin in the corner farthest from the room’s entrance.
- Place spacers against the wall to create an expansion gap. This gap allows the flooring to expand and contract without buckling.
- Lay the first plank, ensuring it is parallel to the longest wall. Use the spacers to maintain the expansion gap along the wall.
- Click or adhere to the subsequent planks by joining the tongue and groove or applying adhesive if it’s a glue-down installation.
- Use a tapping block and rubber mallet to secure the planks together, ensuring they are level.
- Stagger the seams between rows to create a natural, pleasing pattern.
Step 6: Cutting Planks
To fit planks at the edges and around obstacles, measure and mark the plank’s dimensions, then use a utility knife or a circular saw with a fine-tooth blade to make precise cuts. A T-square helps maintain straight lines.
Step 7: Install Transition Strips
Transition strips are necessary for doorways and transitions to other types of flooring. They provide a smooth transition and prevent tripping hazards.
Step 8: Final Row and Trim
The last row of planks may need to be trimmed to fit. Measure the remaining space, cut the planks accordingly, and install them, maintaining the expansion gap. Use a hammer and tapping block to secure the final row.
The Total Cost It Takes
When installing vinyl plank flooring, it’s essential to consider the total cost involved. The cost varies depending on several factors –
Cost of Vinyl Planks: The price of the vinyl planks themselves can vary widely based on quality and style. On average, you can expect to pay between $2 and $7 per square foot.
Underlayment: If your project requires underlayment, budget for an additional $0.50 to $1 per square foot.
Adhesive (for Glue-Down Installation): If you’re using adhesive, factor in the cost, which can be around $20 to $40 per gallon.
Transition Strips: Transition strips range from $5 to $30 per piece, depending on material and design.
Tools: The cost of tools will vary depending on whether you already own them or need to purchase or rent them.
Labor (if hiring a professional): If you’re not tackling the installation yourself, consider labor costs, which can range from $1 to $3 per square foot.
Miscellaneous Expenses: This may include items like spacers, blades for your utility knife, and cleaning supplies.
The total cost of your vinyl plank flooring project will depend on the size of the area you’re covering and the specific products and materials you choose. It’s essential to calculate your budget carefully, accounting for all these factors to ensure a successful and cost-effective installation.
Important Maintenance Tips
- Regularly sweep or vacuum your vinyl plank floor to prevent dirt and debris from scratching the surface.
- Wipe up spills promptly to avoid staining.
- Use a damp mop with a vinyl floor cleaner to clean your floor when needed.
- Avoid abrasive cleaning materials or excessive moisture, as they can damage the floor.
End Note
In conclusion, installing vinyl plank flooring is a rewarding DIY project that can enhance the look and functionality of your home. With proper preparation, careful installation, and a well-thought-out budget, you can enjoy a beautiful, durable, and low-maintenance floor for years to come.